
Live Composting Worms:
Building A Thriving Worm Farm For Beginners
Build Your Own Thriving Worm Farm: A Beginner's Guide
Welcome to the wonderful world of worm composting! This guide will walk you through setting up a basic worm farm to turn your kitchen scraps into nutrient-rich fertilizer for your plants.
Materials you will need :
Two plastic bins (Tip: We use foam boxes: you can get them from supermarkets or Agriculture shops just make sure they are the same size. or you can look for used bins at garage sales or online marketplaces)
If you can get one lid that fits that would be great.
Drill or screwdriver: For aeration holes and drainage.
At least one of the following: Newspaper, shredded cardboard, old egg containers, or leaves.
Water
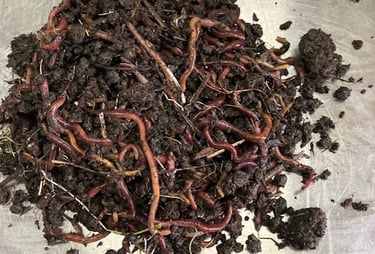
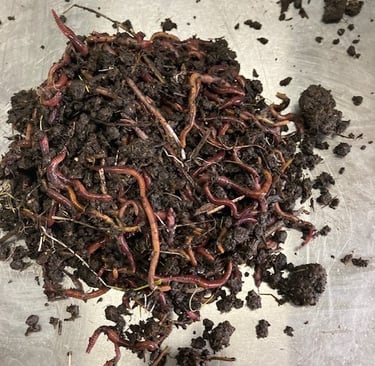
Compost worms (Tip: try to get them locally or as fresh as you can. Worm farms sell them straight from their farms online are the best. We sell ours online at www.willvercity)
Kitchen scraps: Fruit and vegetable peels, crushed eggshells, coffee grounds, tea bags.
(Tip: Just remember we are only going to be filling one box and you can always add more newspaper, shredded cardboard, old egg containers, or leaves and you will be adding in kitchen scraps.)
Instructions:
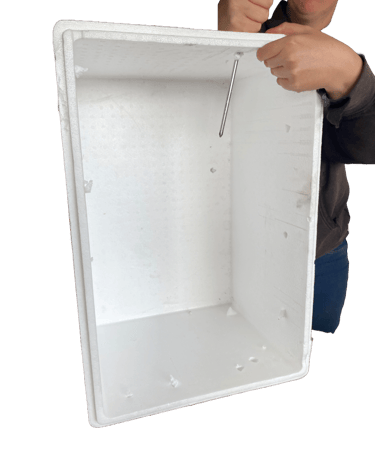
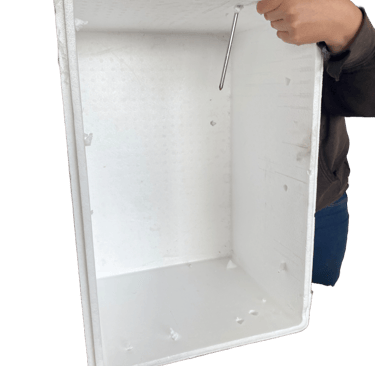
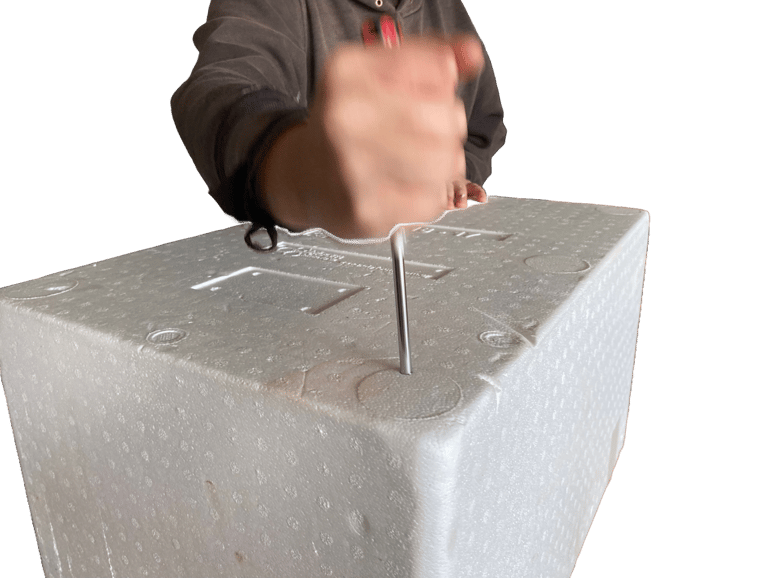
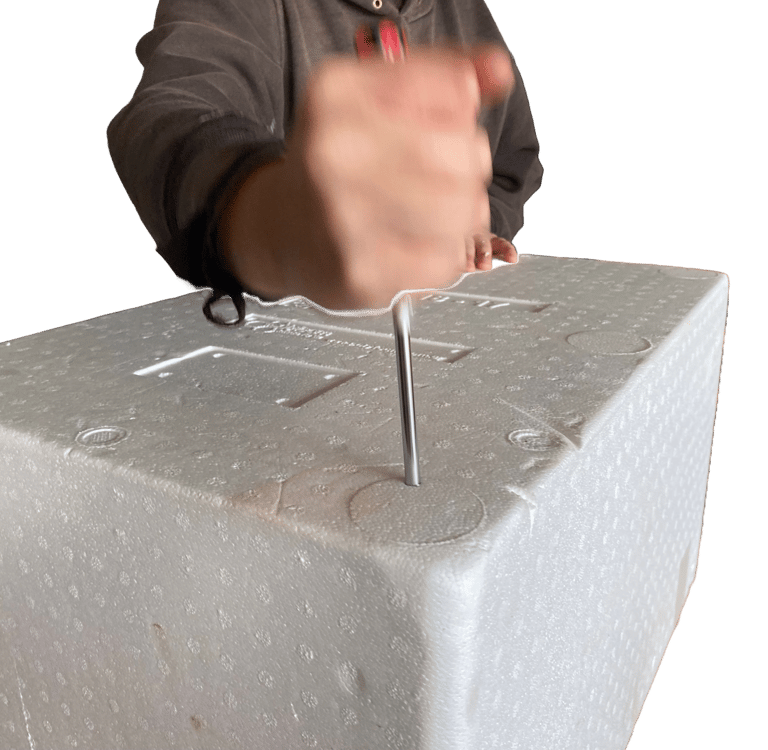
Bin Preparation: If you have never used a drill before please get someone to help.
Choose one bin, as your working bin and the other as your collection bin.
Drill or screwdriver holes in your working bin, make small holes for aeration in
the top half of the sides of the box, one or two for each side with be enough.
In the same box, at each corner of the bottom of the box, make one 1 small
hole, (this will allow any extra water to go through to the bottom box and not
make the worm farm stagnate). By having a hole in each corner it does not matter if it is not level on the ground.
Tips and Tricks
Things to avoid when starting a new worm farm.
Bury citrus peels and onion scraps to avoid attracting unwanted flies.
Avoid meat, dairy, and oily foods, as this attracts other animals like mice and rats.
Never put animal or pet waste into a worm farm unless you know when they were last dewormed. These Drenches are designed to kill worms. (We use Rabbit, cow, and sheep waste in our worm farms all the time, as we know when the animals are dewormed).
Maintaining Your Worm Farm:
Feeding: Add new food scraps when needed, depending on how quickly the worms consume the old scraps.
As your worm farm expands it will consume the food quicker, remember to add Newspaper, shredded cardboard, old egg containers, or leaves.
Don't overload the bin.
Moisture: Check the bedding moisture regularly, and keep it wet at all times. You should be able to pick up the worm castings and squeeze it in your hand and see a drop form but not fall.
Worm farms should not smell: If it starts to have an odour check:
If too wet it will send off a mouldy or stagnant smell. - your drainage holes may be too small or blocked.
Overfeeding / too much food will give a rotten or mould food smell. - stop feeding until all food is consumed.
If worms start leaving the box they are not happy.- is it too hot, not wet enough, do they have enough to eat?
Harvesting the Goodness:
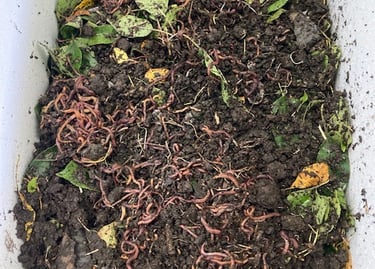
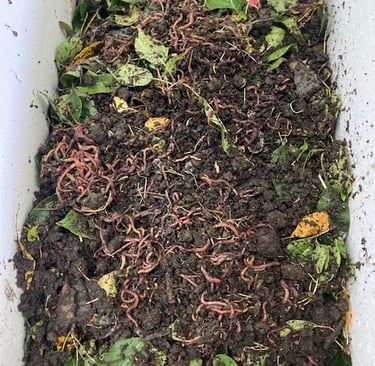
After a few months, the working bin will be filled with worm castings.
To harvest,
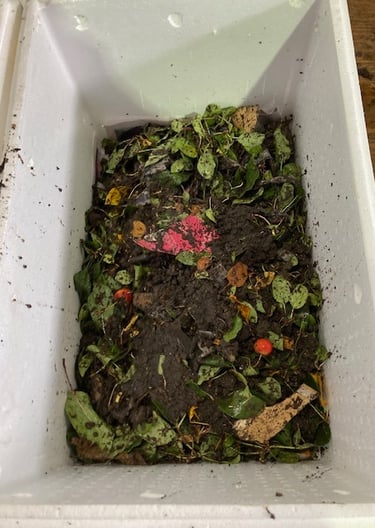
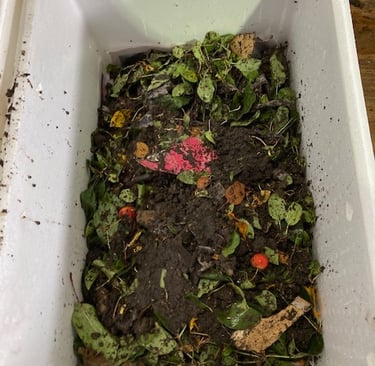
Move the food scraps and any other uneaten materials to one half of the box and only cover this section with cardboard and black plastic. OvernightThe worms will naturally migrate towards the fresh food source and the dark.
You will be able to harvest your casting from the uncovered side, then move the food scraps and any uneaten materials to the side you have just emptied. This should be about 2 to 3 cm or more. If not, add extra bedding as you did above.
Cover this side as before and the worms will naturally migrate towards that side for the fresh food and dark. Leave overnight.
Harvest this side as above.
Make sure that once harvested you have about 2 to 3cm or more bedding evenly spread over the bin.
Feed and cover bins as normal.
Harvesting Your Worm Casting :
Worm castings are full of microbiology and can thrive as long as the moisture is above 60%, therefore they can be stored for periods in an aerated environment. To find out more click the link above
Using your products.
A collection bin will catch any extra moisture that you can use on your plants, however, this can vary in strength and nutrient for your plants as depends on how much water you add you your worm farm. To Make your nutrient-rich worm extract full of everything your plants need check the link above.
Congratulations! You're now a proud owner of a thriving worm farm, turning your waste into valuable fertilizer for a healthier garden.
Congratulations on choosing to start a worm farm.
Worm farming is a simple and effective way to reduce household food waste.
Did you know that a worm can consume its weight in food every day?
It's truly impressive!
To start your own worm farm, all you need is a sheltered area in your garden, such as a balcony, verandas, or pergola. However, if you prefer to keep your worm farm indoors, spaces like a laundry or garage can work just as well.
The benefits of worm farming are numerous, as it not only helps reduce waste but also produces nutrient-rich compost for your plants.
With a little effort and the right conditions, you can become a successful worm farmer and contribute to a more sustainable lifestyle.
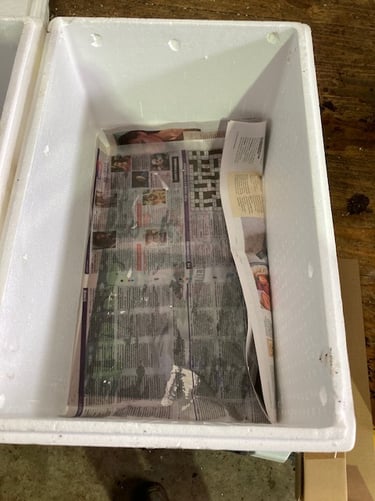
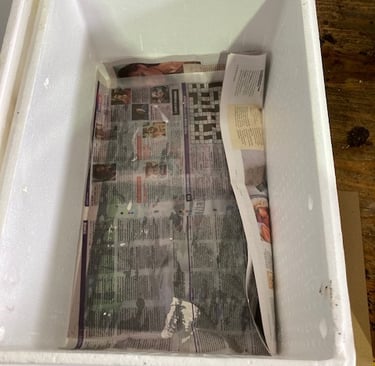
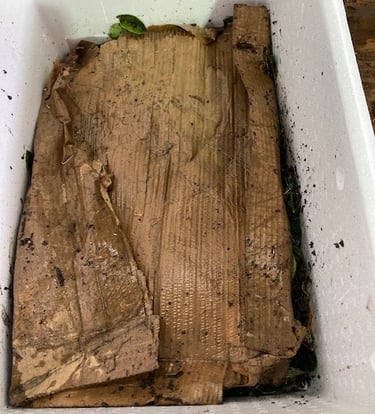
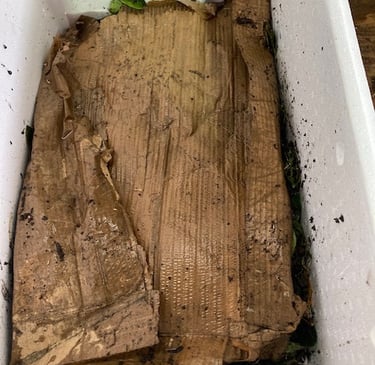
Line the bottom of the working bin with damp newspaper (around 2-3 sheets) or
cardboard.Gather your materials Newspaper, shredded cardboard, old egg containers, or leaves.
They will need to be shredded or torn into small pieces. (Tip: the smaller the pieces
the quicker your worms can eat them.)After shredding them you need to wet all the products. (Tip: cardboard/egg containers,
leaves - we soak ours in a wheelbarrow.) It should be moist but not soggy, like a
wrung-out sponge.Fill the working bin with bedding material about 1/2 way. Leaving plenty of room and
space at the top.
2. Welcome the Worms!
Pour your compost worms onto the bedding. The recommended amount is 500 grams of worms, per 500 grams of food scraps you plan to add each week.
(Tip: Do not worry if you don't have enough worms they breed up quickly.)
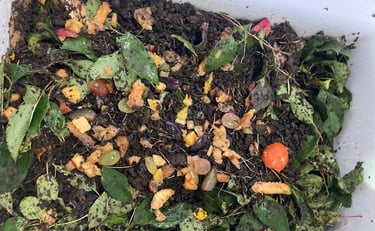
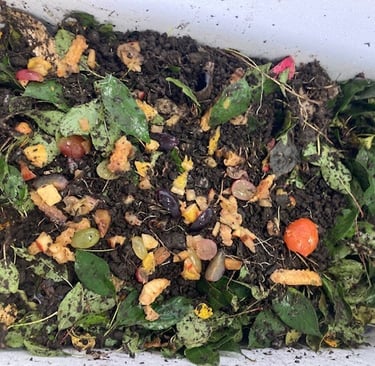
3. Feeding Time:
Cover the bedding surface with a thin layer of chopped kitchen scraps. (remember the smaller the size the quicker the worm eats it. You can even make them smoothies or
blend their food up for them).
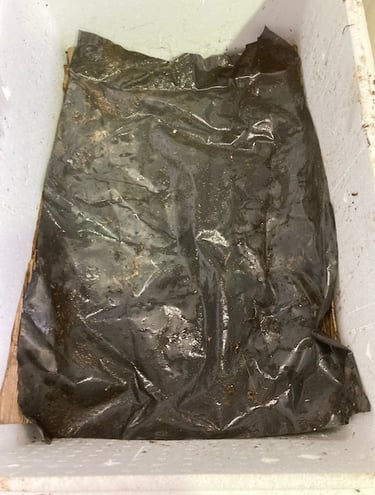
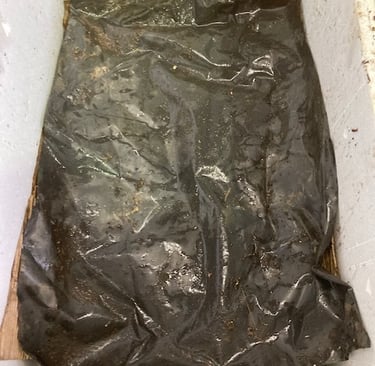
4: Put a cover over them.
We put a layer of, (one of these,) wet cardboard/ carpet/ hessian bag, over them to keep the moisture in.
We then place a piece of black plastic over that so it is dark for them as they
won't come to the top if it is light.
We then put something on top of the box like its lid or a piece of wood. This is to stop the rain coming in and the birds or other animals from getting in and eating your worms.
Put the worm bin where it is going to live.
Store your worm farm in a cool, dark place (around 15-23C).
Avoid direct sunlight and freezing temperatures. (Tip: Under a tree, behind
a shed, or somewhere that is cool and dark would be the best.)The one that we have put holes in is your working bin (where the worms will be)
and this sits on top of the other box (this is the drainage bin.)